This manual provides detailed guidance for maintaining and repairing the Jayco Lift System, ensuring optimal functionality and safety during travel and camping adventures.
Overview of the Jayco Lift System
The Jayco Lift System is a critical component of Jayco pop-up campers, designed to raise and lower the roof effortlessly. It typically consists of a manual or electric winch mechanism, cables, pulleys, and lift posts. This system ensures smooth operation for campers, providing a secure and weather-tight seal when the roof is lowered. Regular maintenance, such as lubricating moving parts and inspecting cables, is essential to prevent wear and tear. Over time, common issues like worn cables, misaligned pulleys, or faulty winch mechanisms may arise, requiring precise repairs. Understanding the system’s layout and functionality is key to performing effective diagnostics and repairs, ensuring reliable performance during camping adventures.
Importance of Proper Maintenance and Repair
Proper maintenance and repair of the Jayco Lift System are vital to ensure its longevity and functionality. Neglecting routine checks can lead to premature wear of cables, pulleys, and winch mechanisms, resulting in costly repairs. Regular lubrication of moving parts prevents corrosion and friction, while timely replacement of worn components avoids sudden system failures. A well-maintained lift system guarantees a safe and enjoyable camping experience, preventing potential accidents caused by a malfunctioning roof. Additionally, adherence to the repair manual’s guidelines ensures compliance with safety standards, protecting both the camper and its occupants. Consistent upkeep also preserves the overall value of the RV, making it a worthwhile investment for years to come.

Safety Precautions and Guidelines
Always follow safety precautions and guidelines when repairing the Jayco Lift System. Wear protective gear, ensure system stability, and adhere to instructions to prevent accidents and ensure reliability.
Essential Safety Measures Before Starting Repairs
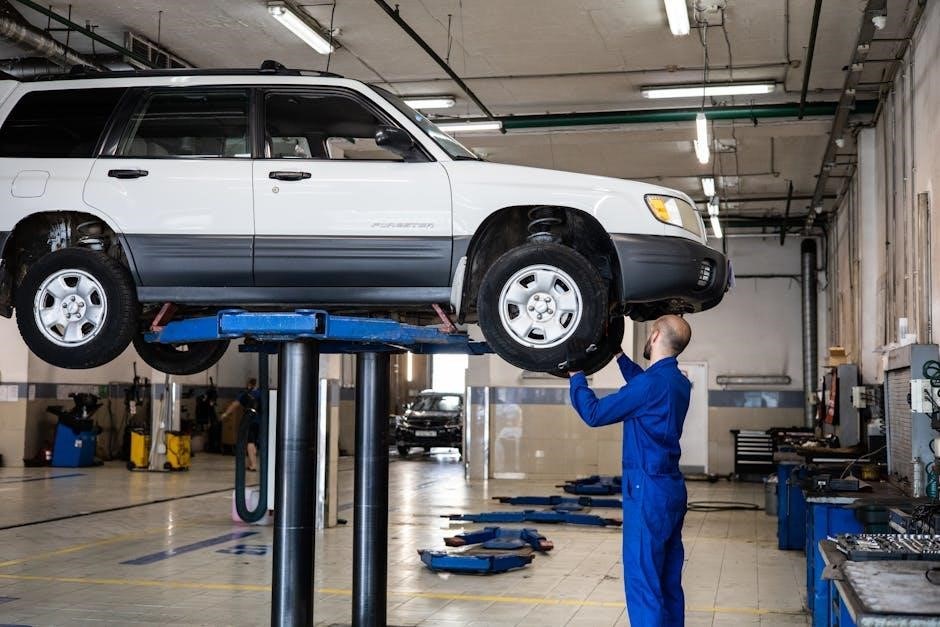
Before initiating repairs on the Jayco Lift System, ensure all safety protocols are followed. Disconnect the power supply and engage the emergency brake to prevent unexpected movement. Secure the RV on level ground using jack stands for stability. Wear protective gear, including gloves and safety glasses, to safeguard against injuries. Consult the official repair manual for specific instructions and precautions. Never attempt repairs under a raised system without proper support. Check for hydraulic leaks or damage before starting work. Avoid overloading the system beyond its rated capacity. Ensure all tools and equipment are in good condition. Maintain a clean and well-lit workspace to minimize risks. Always prioritize caution to prevent accidents and ensure successful repairs.
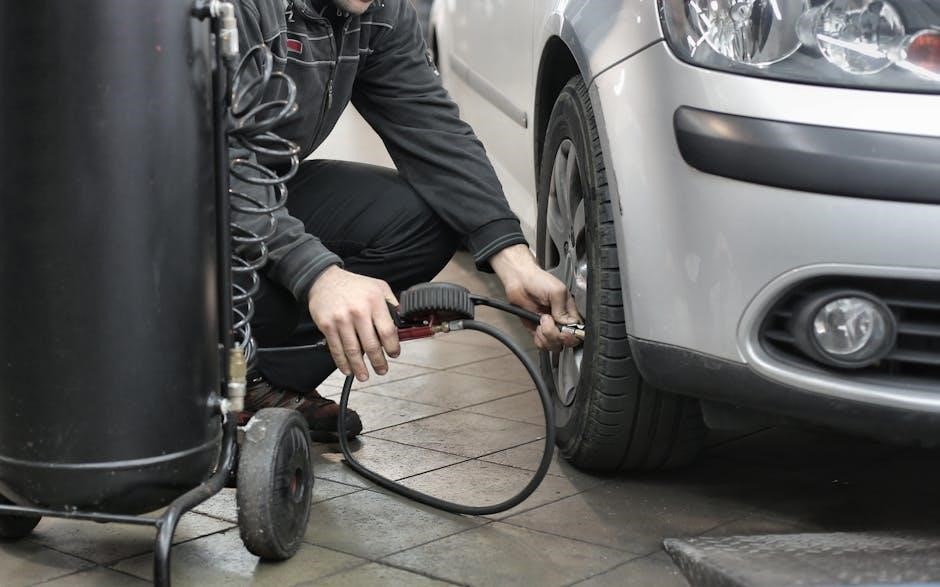
Tools and Equipment Required for Repairs
To effectively repair the Jayco Lift System, gather essential tools and equipment. Basic tools include wrenches, screwdrivers, and pliers. A torque wrench is necessary for precise bolt tightening. Hydraulic line tools, such as a hydraulic pressure test kit, are vital for diagnosing leaks. Lubricants and grease guns are required to maintain moving parts. A multimeter can help troubleshoot electrical issues. Safety equipment like gloves and safety glasses is mandatory. Use jack stands for stabilizing the RV during repairs. Ensure all tools are in excellent condition to avoid further damage. A well-organized workspace with proper lighting will enhance efficiency. Having replacement parts on hand, like cables or seals, can expedite repairs. Always refer to the official manual for specific tool recommendations to ensure compatibility and safety.
Understanding the Jayco Lift System Components
The Jayco Lift System comprises a motor, gearbox, and hydraulic cylinders. These components work together to lift and stabilize the RV, ensuring smooth operation and safety.
Key Components of the Lift System
The Jayco Lift System features a robust design with essential components ensuring reliable operation. The hydraulic cylinders are central, providing the lifting force. A control panel offers user-friendly operation, while sensors monitor and adjust the system for precise leveling. Structural lift arms, attached to the RV’s frame, provide stability and support during elevation. The hydraulic system includes a fluid reservoir and pump, maintaining optimal pressure. Valves regulate fluid flow, preventing system overpressure. Electrical components like wiring and circuit breakers ensure power distribution. Together, these elements ensure the lift system functions smoothly, safely, and efficiently, maintaining the RV’s stability and readiness for various terrains and conditions.
Functionality and Interconnections of Parts
The Jayco Lift System operates harmoniously through the seamless interaction of its components. Hydraulic cylinders generate lifting power, while the control panel manages system operations. Sensors continuously monitor the RV’s position, ensuring accurate leveling. Structural lift arms provide stability, connecting the lift system to the RV’s frame. The hydraulic system, including the pump and reservoir, supplies the necessary pressure for lifting. Electrical wiring connects sensors, valves, and the control panel, enabling precise communication. Valves regulate hydraulic fluid flow, preventing overpressure. This interconnected design ensures smooth operation, maintaining stability and balance. Each part plays a vital role, working together to provide reliable performance and safety for the RV.
Diagnostic Guide for Common Issues
Diagnose lift system issues by identifying symptoms like uneven lifting or slow operation. Use diagnostic tools to detect mechanical or hydraulic faults. Consult the repair manual for troubleshooting guides and manufacturer recommendations to ensure accurate repairs and maintain system reliability. Always follow safety protocols during diagnostics.
Identifying Faults in the Lift System
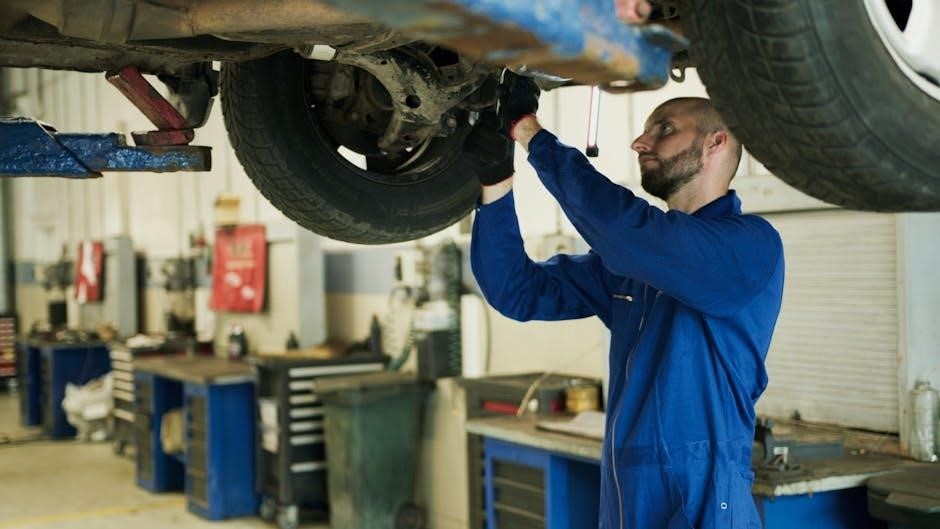
Identifying faults in the Jayco lift system begins with a thorough inspection. Look for signs of wear, such as frayed cables, corroded components, or hydraulic fluid leaks. Listen for unusual noises during operation, like grinding or screeching, which may indicate worn gears or misaligned parts. Check the system’s performance by observing if the lift operates unevenly or fails to reach its full height. Use diagnostic tools, such as multimeters or pressure gauges, to measure electrical and hydraulic performance. Refer to the repair manual for specific troubleshooting steps and fault codes. Always prioritize safety by disconnecting power before inspecting internal components. Accurate identification ensures effective repairs and prevents further damage.
Common Problems and Their Symptoms
The Jayco lift system can experience several common issues that require attention. Hydraulic leaks are frequent, often visible as fluid puddles beneath the RV, and can lead to reduced lifting power. Worn or frayed cables may cause uneven lifting or complete system failure. Misalignment of the lift components can result in poor functionality and increased strain on the motor. Electrical issues, such as faulty switches or sensors, may prevent the system from operating altogether. Additionally, overloading the lift beyond its capacity can cause structural stress and instability. Identifying these symptoms early is crucial to prevent further damage and ensure safe operation. Regular inspections can help address these problems before they escalate.
Step-by-Step Repair Procedures
Begin by gathering tools and reviewing manual instructions. Follow sequential steps to dismantle, inspect, and replace faulty parts. Reassemble carefully, ensuring alignment and torque specs. Test functionality post-repair.
Replacing Worn or Damaged Cables
To replace worn or damaged cables, first ensure the lift system is in its lowest position and secure the RV to prevent movement. Disconnect power and hydraulic supplies. Use cable cutters to remove the damaged cable, taking care not to damage surrounding components. Inspect the cable winch and pulleys for debris or wear. Install the new cable, ensuring proper routing and alignment. Tighten all connections securely, following torque specifications in the manual. Apply wire rope lubricant to moving parts. Test the system by raising and lowering the lift to ensure smooth operation and no binding. Always refer to the official Jayco manual for specific cable replacement procedures.
Rebuilding the Winch Mechanism
To rebuild the winch mechanism, begin by disconnecting the power supply and securing the RV to ensure safety. Remove the winch housing and inspect internal components for wear or damage. Replace any faulty gears, bearings, or seals with genuine Jayco parts. Apply lubricant to moving parts as specified in the manual. Reassemble the winch, ensuring all connections are secure and properly aligned. Tighten bolts to the recommended torque specifications. Finally, test the winch mechanism by operating the lift system through its full range of motion. Proper reassembly and testing are crucial for restoring reliable functionality to the lift system. Always consult the official Jayco manual for detailed instructions;
Adjusting the Lift System Alignment
Adjusting the lift system alignment ensures proper operation and prevents uneven wear. Begin by ensuring the RV is on a level surface and the lift system is fully retracted. Locate the alignment adjustment bolts, usually found near the lift mechanism’s base. Loosen these bolts slightly using a wrench, then adjust the lift arm brackets to align with the RV’s frame. Use a spirit level to confirm accuracy. Tighten the bolts securely after adjustments. Test the lift system by extending and retracting it to ensure smooth, even movement. Regular alignment checks are essential to maintain system performance and prevent damage. Always refer to the Jayco manual for specific torque values and adjustment guidelines.
Maintenance and Preventative Care
Regular maintenance is crucial. Inspect and lubricate moving parts, check for wear, and ensure all bolts are secure. Refer to the manual for schedules.
Regular Lubrication of Moving Parts
Regular lubrication is essential for maintaining the Jayco lift system’s performance. Apply high-quality grease to all moving parts, such as hinges, pulleys, and winch components. Use a silicone-based spray on pivot points to ensure smooth operation. Lubricate every 3-6 months or after exposure to water. Avoid over-lubrication, as it can attract dirt and cause premature wear. Always refer to the manual for specific lubricant recommendations. Inspect cables and wires for fraying or corrosion during lubrication. Proper lubrication prevents rust, reduces friction, and extends the system’s lifespan. Regular checks ensure all parts function seamlessly, maintaining reliability and safety.
Inspecting and Replacing Wearable Items
Regular inspection of wearable items in the Jayco lift system is crucial for preventing unexpected failures. Check cables for fraying, pulleys for wear, and bushings for excessive play. Inspect the winch drum for grooves or damage and ensure all fasteners are secure. Replace any worn or damaged components immediately to avoid system malfunction; Use only OEM-recommended parts for replacements to maintain performance. Schedule inspections every 3-6 months or after extensive use. Lubricate moving parts during inspections to reduce wear. Addressing wearable items promptly ensures smooth operation and extends the lifespan of the lift system. Always consult the manual for specific replacement guidelines and tools required for the task.

Advanced Repair Techniques
Advanced repair techniques involve welding, fabricating system parts, and upgrading the lift system for enhanced performance and durability to ensure longevity and reliability.
Welding and Fabrication for System Parts
Welding and fabrication are critical skills for repairing Jayco lift system parts, especially when dealing with metal components like frames or brackets. Ensure all welds are clean and precise to maintain structural integrity. Use proper safety gear, including gloves and a welding helmet, to protect against sparks and heat. Select the right welding technique, such as MIG or TIG, based on the material thickness and type. For fabrication, measure components accurately and cut materials using saws or plasma cutters. Always use authentic Jayco parts or equivalent materials to maintain system performance. After welding, grind smooth any rough edges and test the strength of the welds; Proper fabrication ensures the lift system operates safely and efficiently.
Upgrading the Lift System for Better Performance
Upgrading the Jayco lift system can significantly enhance its performance and reliability. Consider installing high-performance motors or advanced control systems for smoother operation. Adding reinforced cables or heavier-duty pulleys can increase load capacity and reduce wear. Adjustable tension settings can also be integrated to customize the system’s responsiveness. Ensure all upgrades are compatible with existing components to maintain functionality. Research aftermarket parts designed for your specific Jayco model to avoid compatibility issues. Upgrades should be installed by a professional or experienced technician to guarantee safety and effectiveness. Regularly test the system after modifications to ensure optimal performance. Upgrading not only improves functionality but also extends the lifespan of the lift system, making it more efficient for long-term use.

Reassembly and Testing
Reassemble the Jayco lift system with precision, ensuring all components are properly aligned and securely fastened. Test the system thoroughly to confirm smooth operation and safety.
Proper Reassembly of the Lift System
Reassembling the Jayco lift system requires precision to ensure proper functionality and safety. Start by reinstalling the main frame components, ensuring all bolts are tightened to the specified torque. Next, attach the winch and motor, aligning them correctly with the system’s gear. Reinstall the pulleys and cables, making sure they are securely fastened and properly aligned. Check the cable tension and adjust if necessary to avoid slack or over-tightening. Finally, reconnect any electrical or hydraulic connections, ensuring they are sealed and functioning correctly. Test each component step-by-step to confirm smooth operation before full system activation. Always refer to the manual for specific torque and alignment specifications.
Testing the System After Repairs
After completing repairs, thoroughly test the Jayco lift system to ensure proper functionality. Begin with a visual inspection to confirm all components are securely reattached and aligned. Operate the system manually to check for smooth movement and proper engagement of all parts. Test the electrical components, such as switches and sensors, to ensure they respond correctly. Perform a load test by gradually applying weight to the system, observing its stability and performance under stress. Repeat the process several times to confirm reliability. If any issues arise, halt testing and address them immediately. Document the results for future reference and ensure the system meets safety and operational standards before returning it to service.
Additional Resources and References
Consult official Jayco repair manuals for detailed specifications and procedures. Visit Jayco’s website or authorized dealers for genuine parts and technical support. Engage with online forums for peer advice and troubleshooting tips from experienced RV owners and technicians.
Accessing Official Jayco Repair Manuals
Official Jayco repair manuals are essential for accurate lift system repairs. Visit Jayco’s website or contact authorized dealers to obtain genuine manuals tailored to your RV model. These resources provide detailed instructions, diagrams, and specifications for the lift system. Ensure compliance with manufacturer guidelines by using authentic materials. For model-specific information, refer to the Jayco customer support portal or reach out to their service team. Manuals may also include troubleshooting guides and warranty details. Always verify the source to avoid unauthorized or outdated documents, as they may contain incorrect procedures. Genuine manuals are crucial for safety and proper system functionality.
Online Communities and Forums for Support
Engaging with online communities and forums can provide valuable support for Jayco lift system repairs. Platforms like the Jayco Owners Forum, RV Repair Club, and Reddit’s RV repair communities offer peer-to-peer advice and shared experiences. Many forum members post detailed repair stories, troubleshooting tips, and solutions for common issues. These resources can help diagnose problems or find alternative repair methods. Additionally, specialized RV repair groups on Facebook or dedicated RV websites often share step-by-step guides and photos. When participating, always verify advice with official manuals to ensure accuracy. These online spaces foster collaboration and can be a great supplement to professional guidance, helping you address lift system challenges effectively.